
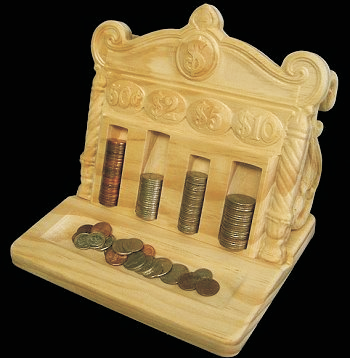
An easy project that will make a beautiful and useful desk accessory that practically anyone will enjoy! The project is carved and cut out using just the two bits that were included with your machine. No other bits are required.
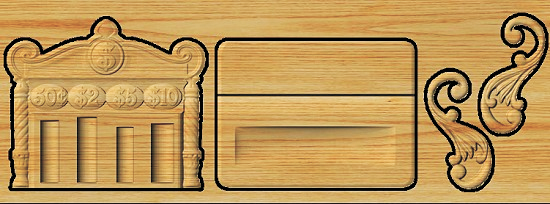
The Vintage Desktop Coin Caddy features a change tray and precisely sized coin troughs for stacking coins as they accumulate. When you fill a coin trough, it holds exactly the right number of coins to make a full roll for each denomination!
ITEMS YOU WILL NEED
- Board with the following dimensions:
- 0.75” x 9.25” x 32” (nominal 1 x 10 x 32” long)
- NOTE: Do not use a board that is shorter in length than specified above.
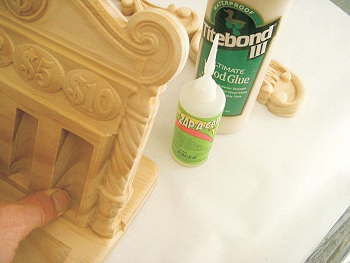
- Wood glue and/or 6-minute epoxy
- CA glue for “tacking” parts
- Wood stain (or paint) and clear finish
- A Dremel-type rotary tool with assorted sanding wheels and bits to sand small details and speed up preparation for finishing.
- Gold Leaf Paint Pen for accenting the raised lettering, if you desire.
STEP 1 – Upload Project
Open the Designer software and open the included project file(s). You can then simply compile (upload) the project(s) to your memory card.
When you compile, you may or may not get a pop-up window with an “Auto-Jig” warning message. If you do see the message, you may safely click on “Ignore” because our actual boards will be large enough that it won’t be an issue.
After the project is compiled, select “Normal or Best” for the File Quality setting. Click “OK” to upload to your memory card.
NOTE: Carve times are as follows:
- Good – # hours # mins
- Best – 3 hours 30 mins
Take and insert the card into your machine and load the project board. Turn your machine on and proceed with Step 2…
STEP 2 – Carving
At the machine, follow the prompts to carve the project.
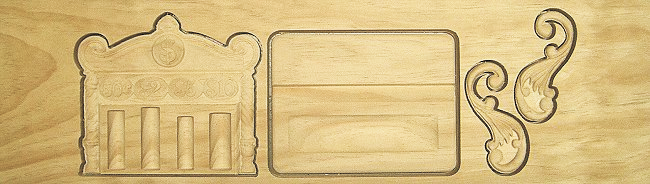
Once the carving is finished, remove it from the machine and vacuum or blow off any excess sawdust. Now separate all the pieces free from the board using a utility knife or razor blade.
STEP 3 – Sanding
Now is the time to sand all surfaces and get the project ready for assembly and finishing. A rotary tool will speed-up the process, using a variety of abrasive wheels and bits as required. You can also use small files, sandpaper scraps, homemade ScotchBrite “wheels” and 3M sanding wheels (80 and 220 grit).
Sand or buzz off the little “tab-nodes” left on the edges of each cutout part. I like to remove any other excess material around the cutouts and blend the edges a little with my Dremel to clean them up. That’s optional and entirely up to you.

Finish up by sanding and smoothing out any stray “fuzzies” left in tight crevices.

STEP 4 – Sealing
After sanding all the components, I laid them out and gave them a light coat of thinned sanding sealer since this was a softwood (pine). You may skip this step if you wish.

After the sealer was dry, I gave everything another light sanding and then prepared for assembly.
NOTE: I chose to assemble the parts before staining and finishing – you may prefer to apply the finish now and glue everything together afterwards with quick-set epoxy. I used wood glue and a tiny amount of CA glue while the parts were still unfinished. (You’ll get a better bond with wood glue if you assemble the pieces before finishing.)
STEP 5 – Assembly
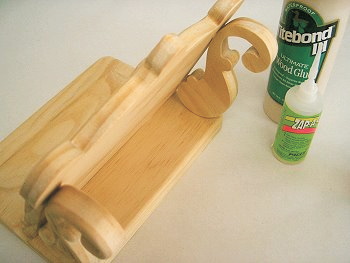
Apply a thin layer of glue on the bottom of the coin trough panel and in the angled rabbet on the tray. Insert the panel and press down so that the bottom edge of the panel is seated nicely on the tray surface.
NOTE: I applied two or three drops of CA glue into the rabbet for an “instant” bond so I wouldn’t have to hold the panel for very long while the glue set-up. If you want to use CA too, be careful that you are lined up
properly and that you don’t get any excess CA on exposed wood surfaces that will be stained later.

Now you can glue on the decorative swirl carvings. Hold them up to the back and mark where the parts touch so you’ll know where to apply glue.
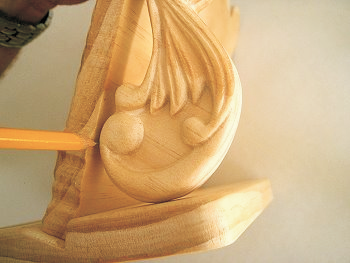
Now apply a dab of glue to the marked areas, and hold the part in place until the glue will keep the part in position on its own.
NOTE: I also used a drop of CA glue in this step to “instantly” hold the parts for me while the wood glue set-up.
STEP 6 – Finishing
I decided to apply a stain to all the components and finish with satin wipe-on poly but you could paint it, or leave it natural if you prefer. Finally, I used a Gold Leaf Pen for the gold accents.
NOTE: Apply the gold leaf accent LAST, and AFTER your final clear coat. Most clearcoats when applied over the “gold leaf” will almost always make it appear dull.
FINAL
I sincerely hope you’ve enjoyed this project. It is certainly very popular around our house and the $$ is racking up instead of getting lost in the sofa cushions!
By the way, you can get free coin roll papers at your bank – just ask your friendly Bank Teller for some on your next visit.
Happy Carving!

