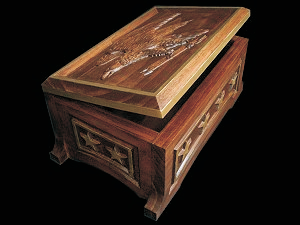
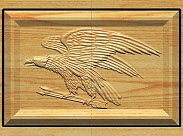
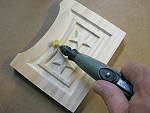
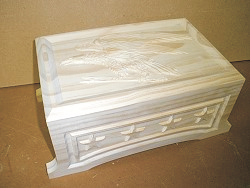
This project features a Colonial-style eagle relief carving on the lid and five-point star accents on the box sides to enhance the overall patriotic theme. The project requires no special bits and the main components are carved and cut out with just the two standard bits that came with your machine.
The finished dimensions of the assembled Colonial Eagle Box are about 13½” wide x 7¾” deep x 6 ” tall.
ITEMS YOU WILL NEED
- Bits:
- 1/8 inch cutting
- 1/16 inch carving
- Boards needed:
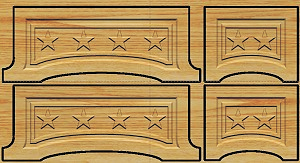
- Box_Sides: .75 ” x 11.125 ” x 28 ”
- Box_Lid: .75 ” x 9.25 ” x 20 “
- Other items needed:
- Hinge(s) for lid – your choice (I used a Brainerd 8″ piano hinge #1268XC from www.hardwareworld.com)
- Recommended Items:
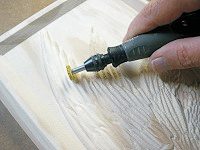
- A Dremel-type rotary tool with assorted sanding wheels and bits to sand small details and speed up preparation for finishing.
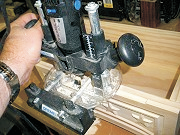
- Wood chisel and/or miniature router attachment for your rotary tool for creating a hinge mortise.
- Sandpaper, box clamp (strap), wood glue, wood stain and/or paint and clear finish
STEP 1 – Upload Project
Open the Designer software and open the included project file(s). You can then simply compile (upload) the project(s) to your memory card.
When you compile, you may or may not get a pop-up window with an “Auto-Jig” warning message. If you do see the message, you may safely click on “Ignore” because our actual boards will be large enough that it won’t be an issue.
After the project is compiled, select “Normal or Best” for the File Quality setting. Click “OK” to upload to your memory card.
NOTE: Carve times are as follows:
- Colonial_Box_Sides.mpc
- Good – 3 hours 30 mins
- Best – 7 hours
- Colonial_Box_Top.mpc
- Good – 2 hours
- Best – 4 hours 15 mins
Take and insert the card into your machine and load the project board. Turn your machine on and proceed with Step 2…
STEP 2 – Carving
At the machine, follow the prompts to carve the project.
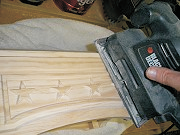
Once the carving is finished, remove it from the machine and vacuum or blow off any excess sawdust.
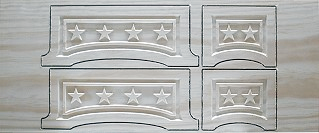

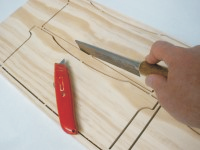
STEP 3 – Separating the Pieces
Separate all the pieces from the boards with a utility knife or hobby saw, then sand all the components to remove any fuzzies and undesirable tool marks.
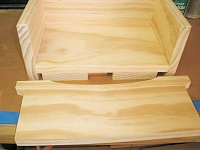
STEP 4 – Assembly
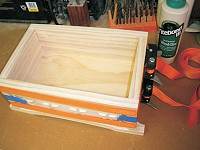
Cut the bottom of the box measuring about .75 ” x 6.25″ x 10.25″. TIP: Arrange/tape the box sides together (upside down on top of your wood stock) and trace the inside area with a pencil for a perfect fit for the bottom. Place some 3/4” scrap wood under the bottom to raise it up to the correct level inside the box. Glue the sides and bottom together and clamp overnight.
STEP 5 – Hinges
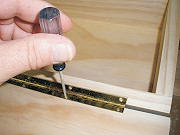
When dry, remove the clamps. Select your hinges. You can use a single piano hinge or two ‘regular’ hinges. I used a 8″ x ¾” piano hinge. Position the hinge on the box edge and outline it with a pencil.
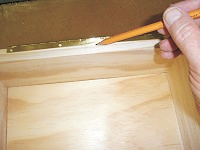
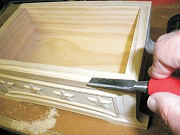
Using your mark as a guide and working very carefully, use a hand chisel or miniature router to remove enough material within the mark so the closed hinge will sit flush with the box edge.
Make pilot holes and screw the hinge into the recessed area. Line up the lid, make pilot holes, and screw on the lid.
Sand the box lid so that it is flush with the box sides. Remove the hinge before applying your box finish.
STEP 6 – Finishing
Apply stain/paint and clearcoat of your choice. Here’s what I used on my Colonial Eagle Box made from Select Pine:
- one very light coat of thinned Bullseye Sealcoat (2 parts sealer/3 parts Denatured alcohol)
- sanded again with very fine sandpaper & Dremel
- Minwax English Chestnut #233 stain
- three coats Krylon Clear Gloss Acrylic spray
- three coats Minwax water-based Satin polycrylic
- Gold Rub-N-Buff to accent select details
After the finish is dry, re-install your hinges.
FINAL
I hope you have enjoyed this project!
This project lends itself to numerous finishing possibilities. A red, white and blue color scheme, with a dark stain applied and wiped off would give a nice ‘antique’ appearance. Other options include flocking the interior of the box or lining the interior with self-adhesive felt. Have a great time coming up with your own ideas!
Happy Carving!