Designed for CarveWright by Michael Tyler – www.carvebuddy.com
Here’s a unique Valentine’s Day gift to display year ‘round on a bookshelf, tabletop or mantle!
The project features three large “candy” hearts with engraved text messages and a small heart “sprout” all enclosed in a fenced garden setting!
You can choose any number of ways to finish the project. I used acrylic craft paints wiped on with a rag to intentionally leave some exposed wood grain, but you can apply stains, dyes, metallic paints, glitter, or whatever strikes your fancy.
Enjoy making your own Candy Hearts Love Garden!

The project uses just the 1/16 Carving Bit and the 1/8 Cutting Bit. No other bits are required.
Overall dimensions are about : 10.5″ long x 2.5 ” deep x 6.25 ” tall
Main items you will need:
1.) The Project Files (included):
• Hearts-and-Stems.mpc
• Base-and-Fence.mpc
2.) Boards with the following dimensions:
• Hearts and Stems: 0.5 ” x 5.5 x 24 “
• Base and Fence: 0.5 ” x 5.5 ” x 24 “
(The 0.5 ” x 5.5 ” x 24 ” boards are clear Pine craft boards available from most Home Centers and Hobby Stores)
NOTE: Do not use boards that are smaller than specified above unless using an appropriate jig.
3) Sandpaper, wood glue, stain and/or paint and clear finish
4) A Dremel-type rotary tool with assorted abrasive attachments to aid the sanding process. Various hand-files and sanding sticks, a spindle sander and small belt sander can help speed up sanding/surface prep.

STEP 1- Upload Project File(s)
Start Designer and open the .mpc file(s). (fig. 1a)

All you need to do at this point is upload the project files to your memory card. (File/Upload). When you upload, you may or may not get a pop-up window with an “Auto-Jig” warning message (Fig. 1b)

If you do see the message, you may safely click on “Ignore” because our actual boards will be large enough that it won’t cause any problems at all. After each project is compiled, select “Best” or “Optimal” for the File Quality carve setting. (I used “OPTIMAL”.) Click “OK” and upload the mpc project file(s) to your memory card. Insert the card into your machine and load a board that measures the appropriate dimension specified for the particular mpc (see page 1 for board dimensions). Turn on your machine and proceed with the project setup in Step 2…
STEP 2 – Running the MPC File(s)
You will see “Project Menu” on your LCD display. Press “1” and scroll to Hearts-and-Stems.mpc project, and press the green ENTER button to select it. Then follow the additional LED prompts as follows…
- Stay Under Rollers – press 1) NO
- DID YOU KNOW? If you’re using the specified board sizes, it doesn’t matter if you select YES or NO because those board sizes have the extra 7 inches of length that will keep the project under rollers either way. See 7 inch rule for further explanation
- DO NOT RESIZE or SCALE the projects! If prompted, always keep the original size. No scaling!
- How To Place – press 1) Center
- Cut Board to Size? – press 2) NO
- Select Cutting Bit: 1/8″ Cutting – Press ENTER. The machine will move the bit holder to the center.
- Load Bit: 1/8″ Cutting -Insert your 1/8″ cutting bit, then press the green ENTER button. (homes, etc.)
- Select Vector Bit: 1/16″ Carving – Press ENTER. The machine will move the bit holder to the center.
- Load Bit: 1/16″ Carving – Remove the 1/8″ cutting bit, and insert your 1/16″ carving bit, then press the green ENTER button. After homing and finding surface, the vector carving process is performed.
- After it is done carving, you will be prompted to load your 1/8″ cutting bit. Remove the 1/16″ carving bit and insert your 1/8″ cutting bit. Press the green ENTER button. The machine will perform the cutouts.
- Remove the board and proceed to run the Base-and-Fence.mpc using same procedure as above. No Carving Bit will be requested for this mpc – the prompts will simply ask for the “1/8 Cutting Bit” for the vector pockets and cutout procedures.

fig. 1b Your boards will look something like this…(fig. 2)


STEP 3 – Separate Parts from Material
Separate all the parts from the boards. Sand off tabs, toolmarks and fuzzies. (fig. 3a, 3b, 3c)


STEP 4 – Finish Application and Assembly
Apply the finish of your choice. Depending what you decide, you may need to apply finish to some parts prior to final assembly. I decided to apply stain to the Base, leave the fence natural and apply acrylic craft paint to the stems and hearts. (fig. 4a, 4b)


NOTE: The front of the base is where 3 pockets are the closest to the long edge.
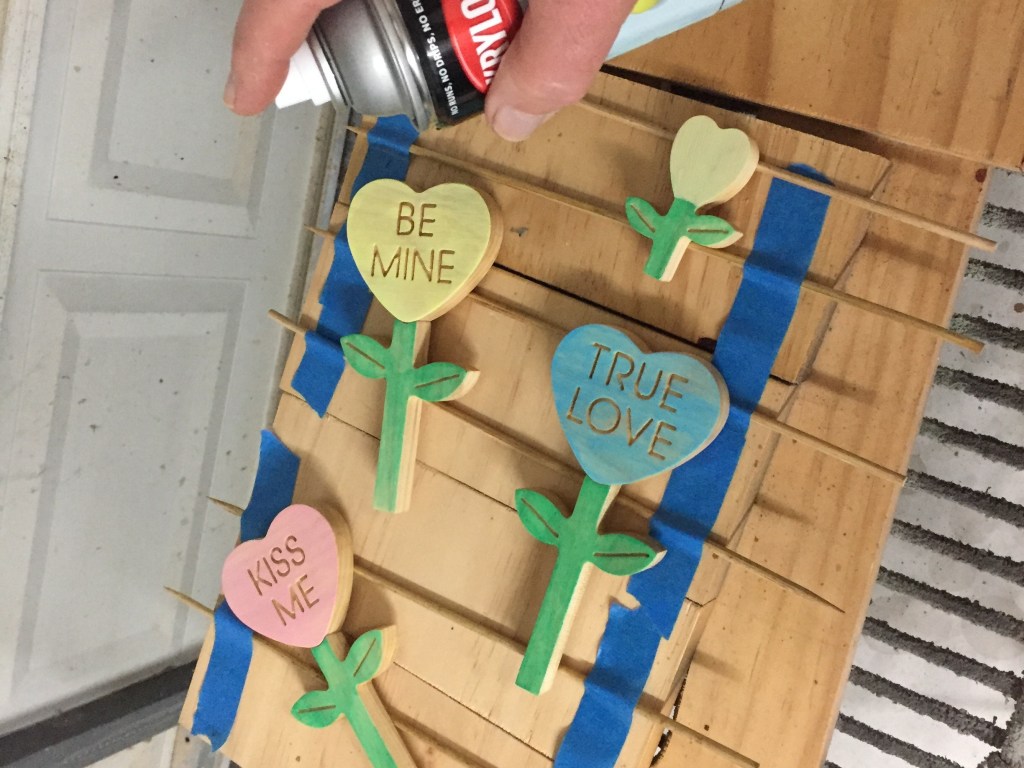
Apply finish to Stems and Hearts. (fig. 4c, 4d, 4e)
- Applied two coats thinned Bulls Eye SealCoat(50/50 denatured alcohol and SealCoat). Sanded when dry.
- Applied 1 coat full-strength SealCoat then sanded
- Applied acrylic craft paints to hearts and stems by wiping on the paint with a rag wrapped around my finger
- Applied several light coats Krylon Clear spray (Gloss to build finish, then Flat as final coats)


Lay down a sheet of waxed paper onto a flat surface, then glue the hearts to the stems. (fig. 4f)

Apply a few light coats of Krylon clear Gloss to the heart/stem assemblies. (fig. 4g)
Glue the stems into the Base. The tallest stem goes into the slot nearest the back edge. Apply final clearcoats when dry. (fig. 4h, 4i)


Materials Source Reference

- 3M Radial Bristle Discs
- (stack 3 discs at a time on your rotary tool mandrel)
- 80-grit (yellow) is what I use exclusively, but other grits are available NOTE: grits finer than 220 are not recommended for wood
- Purchase from:

Items Purchased at Home Depot™ or Lowes™
- Zinsser Bulls Eye SealCoat (same as 100% de-waxed shellac)
- Denatured Alcohol (Home Depot™ or Lowes™)
- Krylon Clear Spray
- 0.5 ” x 5.5 ” x 24 ” Clear Pine craft boards
Items Purchased at Hobby Lobby™ or Michael’s Arts & Crafts™
- Acrylic Craft Paints
I hope you enjoyed making your Candy Hearts Love Garden!
Happy Carving from Michael Tyler of CarveBuddy.com!
