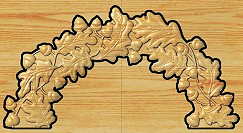
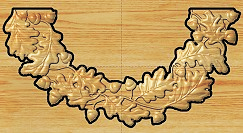
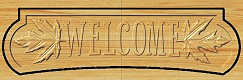
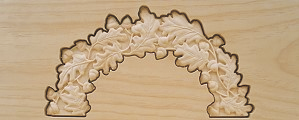
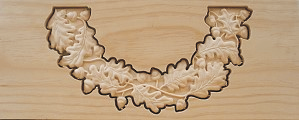
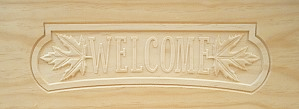
The Autumn Wreath project features a ring of intertwined Oak leaves and Acorns with a “Welcome” plaque to greet your guests as they arrive at your home! The project also includes a “plain” plaque that you can customize with your own wording and/or patterns.
The project uses just the two bits that came with your machine. No other bits are required.
The finished, assembled wreath is about 16½ ” in diameter x 1½ ” thick.
ITEMS YOU WILL NEED
- Boards with the following dimensions:
- Top and Bottom: .75″ x 9.2″ x 24″ (two)
- Plaque: .75″ x 5.5″ x 24″ (one)
- NOTE: Do not use boards that are shorter in length than specified above.
- 1″ long #6 Wood Screws (four)
- Sandpaper, wood glue, CA wood adhesive, wood stain and/or paint and clear finish
- A Dremel-type rotary tool with assorted sanding wheels and bits to sand small details and speed up preparation for finishing.
STEP 1 – Upload Project
Open the Designer software and open the included project file(s). You can then simply compile (upload) the project(s) to your memory card.
When you compile, you may or may not get a pop-up window with an “Auto-Jig” warning message. If you do see the message, you may safely click on “Ignore” because our actual boards will be large enough that it won’t be an issue.
After the project is compiled, select “Normal or Best” for the File Quality setting. Click “OK” to upload to your memory card.
NOTE: Carve times are as follows:
- Autumn_Wreath_TOP.mpc
- Good – 2 hours
- Best – 4 hours
- Autumn_Wreath_BOTTOM.mpc
- Good – 2 hours
- Best – 4 hours
- Autumn_Wreath_WELCOME.mpc
- Good – 1 hour 45 mins
- Best – 3 hours
Take and insert the card into your machine and load the project board.
Turn your machine on and proceed with Step 2…
STEP 2 – Carving
At the machine, follow the prompts to carve the project.
Once the carving is finished, remove it from the machine and vacuum or blow off any excess sawdust.
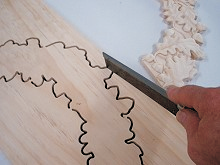
STEP 3 – Working the Pieces
Separate all the pieces from the boards with a utility knife or hobby saw.
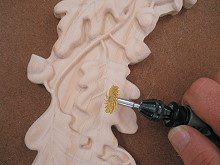
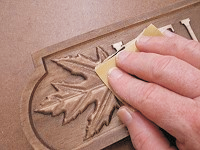
Use a Dremel-type tool to sand off the tabs and sand all the components to remove any fuzzies and undesirable tool marks. I use a variety of abrasive bits to clean up the edges and buzz off the tabs quickly and efficiently.
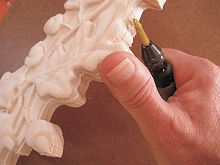
I also use 3M Radial Bristle Discs from www.mcmaster.com to safely remove fuzzies from carvings without loss of detail.
Glue the two halves together on a flat surface covered with waxed paper.
NOTE: The glue seams will be hidden by the plaque.
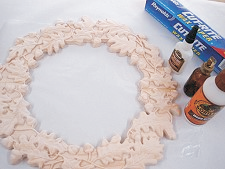
I used wood glue and CA wood adhesive (super glue for wood) to tack the parts while the regular wood glue cured.
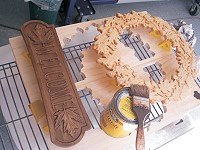
STEP 4 – Finishing
Apply stain/paint and clearcoat of your choice. Here’s what I used on my Autumn Wreath made from Select Pine:
- Welcome Plaque
- applied Minwax Natural stain #209 overall (helps seal end grains)
- applied Minwax Special Walnut stain #224 (within a few minutes of the Natural #209 application)
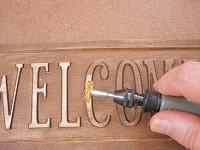
- sanded tops of letters and scuffed leaves for contrast
- applied several spray coats of Krylon clear acrylic
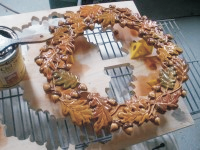
- Wreath
- applied Minwax Natural stain #209 & allowed to dry
- applied 2 light spray coats of Krylon clear acrylic
- painted leaves and acorn caps with acrylic craft paints
- 2 more coats of Krylon clear acrylic
- Minwax Cherrywood Gel stain #607 as a brush-on/brush-off, glazing technique over entire wreath applied several spray coats of Krylon clear acrylic
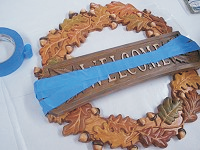
STEP 4 – Final Assembly
Position the plaque on the wreath, as desired (to span over the joint seams) and temporarily tape in place.
Turn the wreath over and drill four countersunk holes from the back side for the #6 wood screws (above and below each glue seam). Be careful not to drill too deep so the screws won’t poke through the front side.
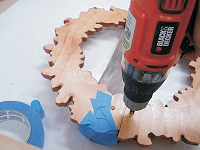
Fasten the plaque onto the wreath with the screws to complete your project.

FINAL
I hope you enjoy your Autumn Wreath for many seasons to come!
Happy Carving!