
The Egg-centric Repository is a fun and whimsical container for all manner of “stuff”! Stow wrapped candies or paper clips on the desk, or whatever strikes your fancy – it’s all up to you. It is certainly a conversation starter. Friends and family will take notice of this somewhat humorous rendition of a “box”!
The overall dimensions of the Egg-centric Repository, including the stand, are about: 8″ dia. x 8 ” tall.
The egg itself measures about: 4.5″ dia. x 6.75 ” tall.
STEP 1 – Upload Project
Open the Designer software and open the included project file(s). You can then simply compile (upload) the project(s) to your memory card.


After the project is compiled, select “Normal or Best” for the File Quality setting. Click “OK” to upload to your memory card.
NOTE: Carve times are as follows:
- Eggcentric.mpc
- Good – 4 hours
- Best – 6 hours
- Egg_Stand.mpc
- Good – 20 mins
- Best – 22 mins
STEP 2 – Carving
At the machine, follow the steps to carve the project.
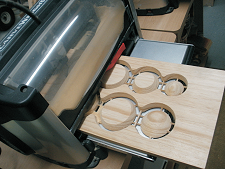
Once the carving is finished, remove it from the machine and vacuum or blow off any excess sawdust.


STEP 3 – Mark, Separate and Dry-Fit Parts
Before separating the eggcentric parts from the board, mark their part numbers using a pencil, referring to the Guide at the end of this document.
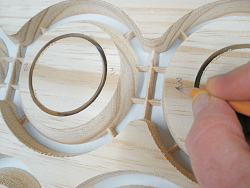
Separate the pieces from the board with a utility knife, wire cutters or hobby saw. Don’t sand the exteriors of the egg until after glue-up.

Dry-fit (stack) the parts to get yourself oriented to how they go together. I like to arrange the stack so that the grain creates a pleasing pattern. I make alignment marks on each part so I can line them up again during glue-up. This is not necessary if you plan on painting the egg which hides the grain.

STEP 4 – Assembly & Finish Prep
Sand the stand parts. Square-off the inside rounded corners of the leg slots with a file to yield a good fit to the ring. Glue the legs to the stand ring using the small recesses in the ring as a placement guide. Set on a flat surface and clamp until dry.


Glue the top segments 7, 8, and 9 together, being careful to center each segment with each other. Set aside. Do not be concerned with any apparent layer mismatches – these will be sanded out later. Just be sure you are gluing the proper segments together!
Now glue bottom segments 2, 3, 4, 5, and 6 together (do NOT glue segment 1 yet). Set aside to dry.

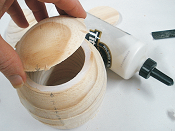
After the bottom assembly has thoroughly dried, sand the interior using a spindle sander or a large dowel wrapped with sandpaper.

After sanding the interior completely smooth, Glue on section 1 (to section 2) and allow to dry.

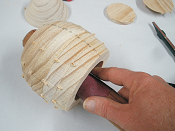
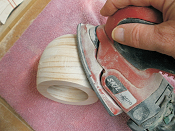
When dry, sand the outside of the egg sections to blend and smooth the seams. Combine hand sanding, rotary tool, finger files and/or a power sander to expedite the
job. I started with very coarse 80-grit for the general shaping and blending, and worked my way finer with 100, 150 and 220-grit.
It is important to use a sanding block for main shaping. This assures the contours can be followed closely without creating uneven “waves” between soft and harder portions of the wood. I used a wooden block and a flexible foam block for hand sanding as well as a small power sander, files and Dremel tool.

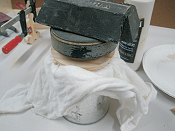
Glue the lid disc on the underside of the top section. Check centered alignment and place the egg top inverted on a small can or jar. Place a rag as a cushion and weigh down until the glue is set. Check fit after the glue has dried. Do final touch-up sanding if required.


STEP 5 – Finishing
Apply stain/paint and a clearcoat of your choice. Here’s what I used on my Egg-centric Repository made from Select Pine:
Egg Stand:
- Rust-Oleum Golden Mahogany Ultimate Stain
- Several light coats of Krylon acrylic clear spray
Egg-centric Container:
- Brushed 7 coats of full-strength Bulls Eye SealCoat sanding with 400-grit between coats for a high-gloss finish.
Apply three self-stick silicon or felt “dots” to the inside of the ring to cushion the egg when placed in the stand.


FINAL
I hope you enjoyed making your Egg-centric
Repository! I created the sample as a “pure” egg with no adornment. However, there are endless possibilities to decorate the egg as you wish. A few starter ideas are:
- Use “puff paint” to create raised, extruded designs
- Use a wood burner to create burned-in designs
- Apply gold, copper or silver leaf to the egg
- Coat with metallic paints and apply an antique patina
- Apply spray “stone” texture or marbleizing paint
- Modify the MPC file to include a small drill hole in the center of the top, then insert a decorative wooden or metal knob as a “lift” handle
Happy Carving!


