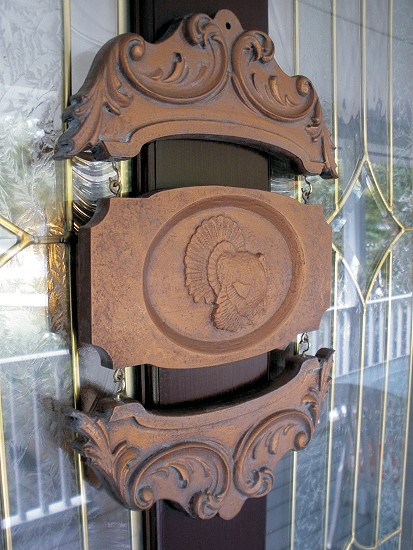
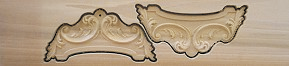
Easily customize your Cascading Holiday Placard for any occasion!
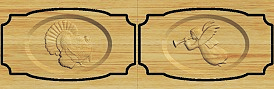
A Thanksgiving Turkey and Christmas Angel placard are included to get you started. The project uses just the two bits that came with your machine. No other bits are required.
The finished project dimensions are about ¾” x 9” x 13”
STEP 1 – Upload Project
Open the Designer software and open the included project file(s). You can then simply compile (upload) the project(s) to your memory card.
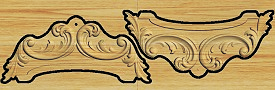
Holiday_Placard_Top-Bottom.mpc
Thanksgiving-Christmas_Placards.mpc
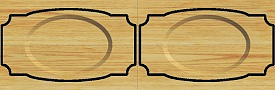
Blank_Customizable_Placards.mpc
NOTE: Carve times are as follows:
- Holiday_Placard_Top-Bottom.mpc
- Best: 1 hr. 30 min.
- Optimal: 2 hrs. 15 min.
- Best: 1 hr. 30 min.
- Thanksgiving-Christmas_Placards.mpc
- Best: 45 min.
- Optimal: 1hr. 30 min.
STEP 2 – Carving
You will see “Project Menu” on your LCD display. Press “1”, then scroll to the desired project and press the green ENTER button to select it. Then follow the prompts to carve the project.

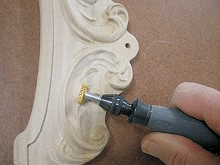
STEP 3 – Separate Parts
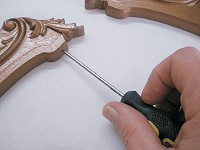
Separate all the parts from the boards with a utility knife or hobby saw. Sand the components to remove the tabs and any undesirable toolmarks.
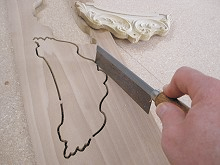
A Dremel-type tool with 3M sanding discs and fine-point abrasive bits can speed up the process.
STEP 4 – Apply Finish
Apply stain/paint and a clearcoat of your choice. Here’s what I used on my Cascading Holiday Placards made
from Poplar and Select Pine:
- Three coats of thinned Bullseye Sealcoat (2 parts sealer/3 parts Denatured alcohol)
- Sanded between coats
- Two coats full-strength Bullseye Sealcoat
- Applied Krylon Fusion spray paint #2533 Hammered Copper color
Apply “Antique Patina” (optional)
Brush on thinned Burnt Sienna water based craft paint
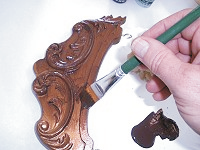
Immediately wipe off excess with paper towels and dry brush, then dab lightly with a piece of sea sponge for an “uneven” aged effect.

Brush on thinned light/pale green, wipe off excess, etc., and burnish as before.
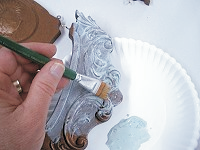
Lightly burnish high-points of carvings with cloth rag or paper towels.
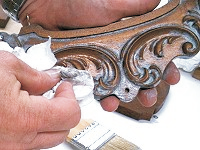
Apply clear coat if desired
STEP 5 – Final Assembly
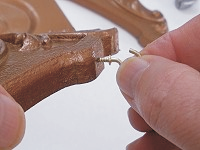
Make pilot holes in the center of the thickness of the material with a sharp awl. Position the holes about ⅜” in from the outer edges of top, bottom and placard ends
for the screw eyes and hooks.
Screw in the hooks on the top and bottom, then screw in the screw eyes on the placards.
Finally, hang your choice of placard between the decorative top and bottom components.


FINAL
I hope you enjoy incorporating your own designs for your placards. Make a placard for each season and/or holiday using any suitable pattern. It’s a unique and classy way to ‘announce’ any special occasion too (new baby, anniversary, birthday, graduation). Another idea is to hang several placards with the oval cut out to make a “frame” to display family photos.
Happy Carving!