Skip to content
This was one of the first projects I made on the RAVEN CNC. I had access to a vacuum former that I’ve been wanting to use the CarveWright with. Carving the tombstones molds for vacuum forming is an obvious super power for this CNC, but I needed a fun project to try this out with.
Designing the Mask
The idea came from images Shawn Thorsson had posted from the Wasteland Weekend Festival in the Mojave desert in California. It looks like an amazing time and I hope to make it out there one of these years.
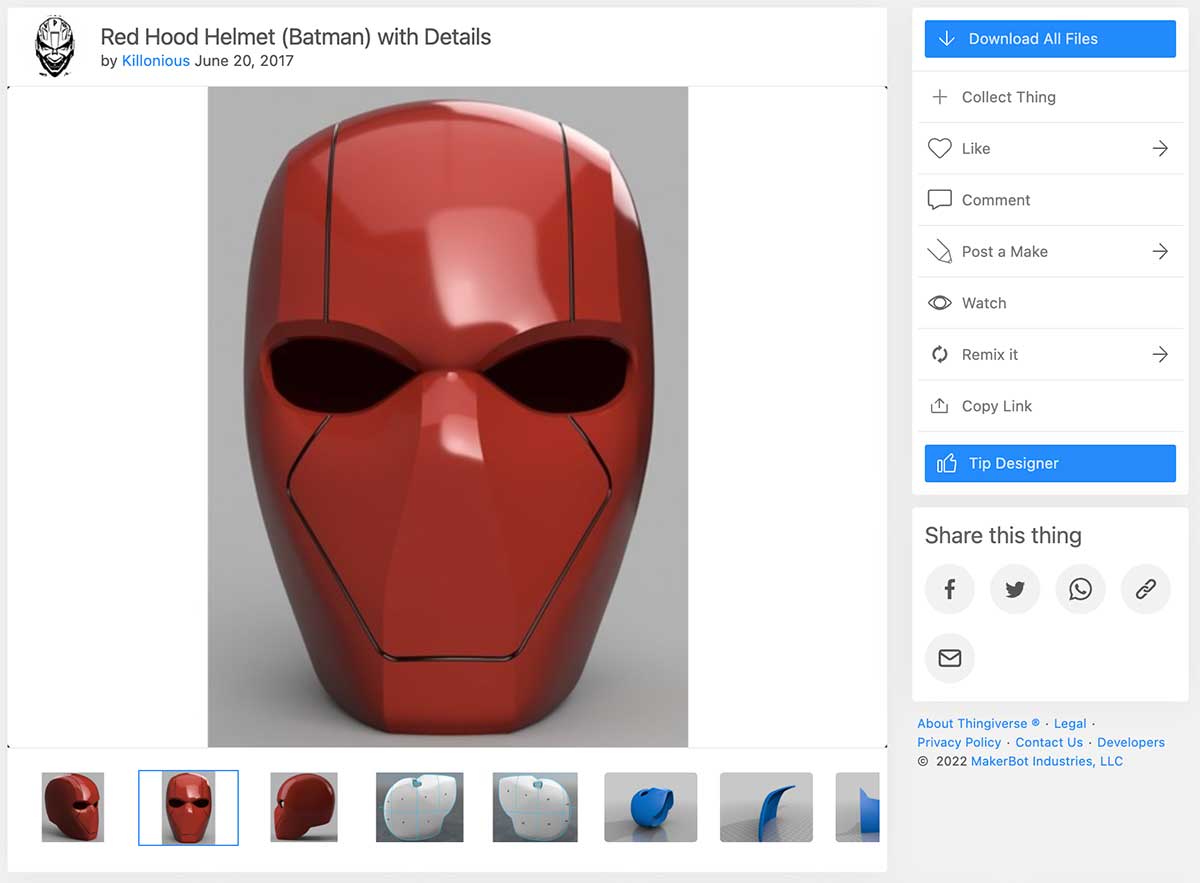
I started with a Red Hood mask STL I found on Thingiverse. It has very little detail but is already the right size and shape for a mask.
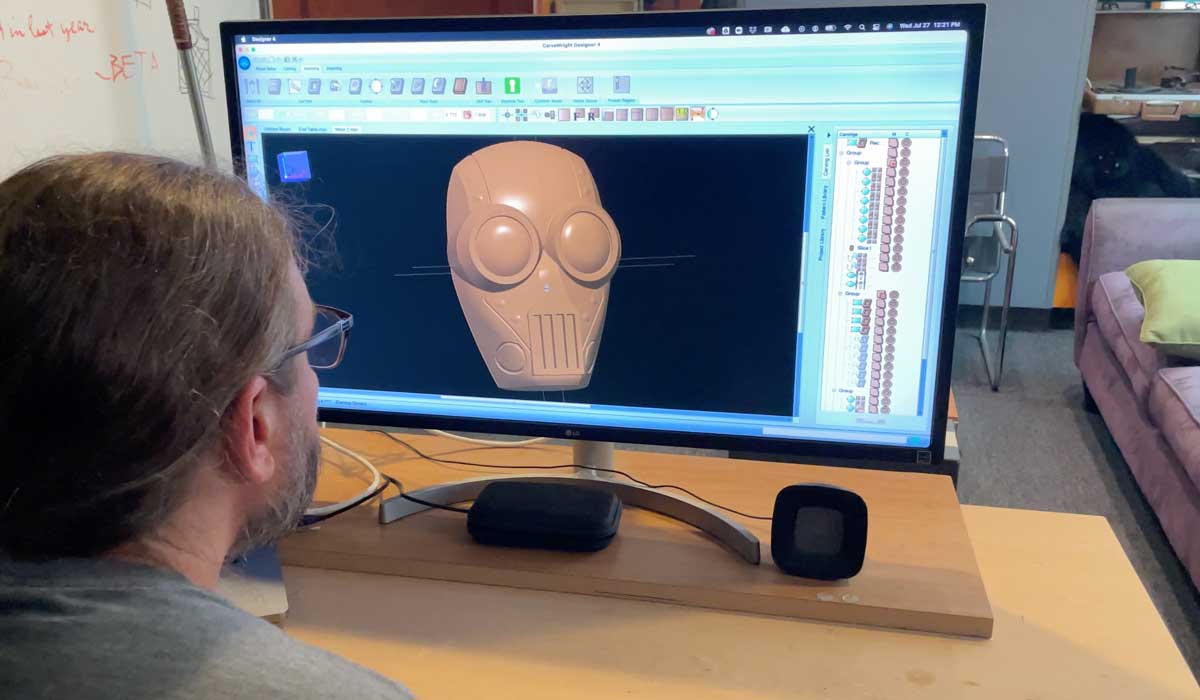
I then used Designer 4 and the Modeling Suite tools to draw and puff out my own elements to transform it into my own creation.
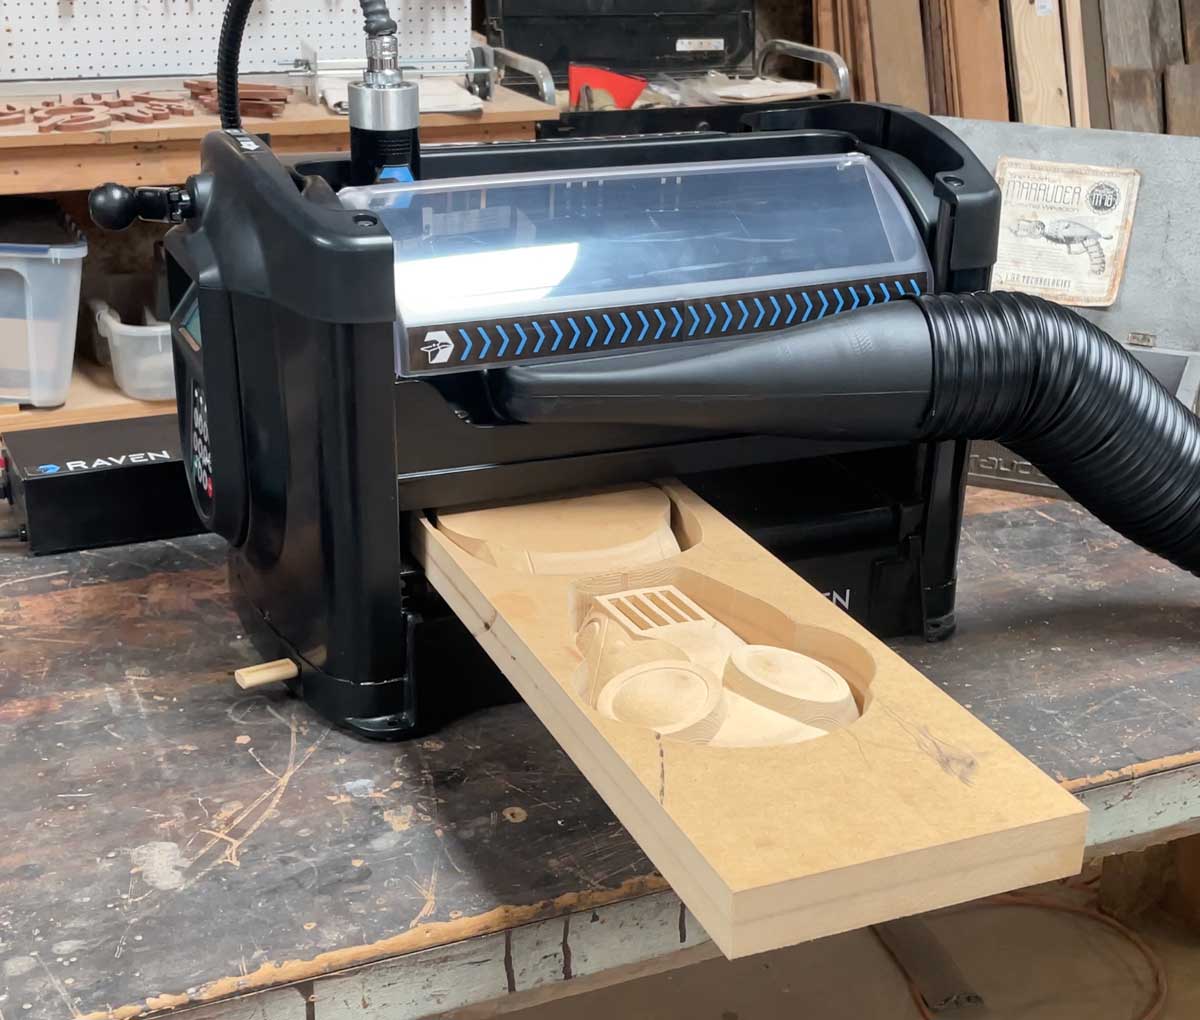
Once the design was finished I made it into a pattern and exported it as an STL so I could bring it into Slicer and slice it to fit on my board.
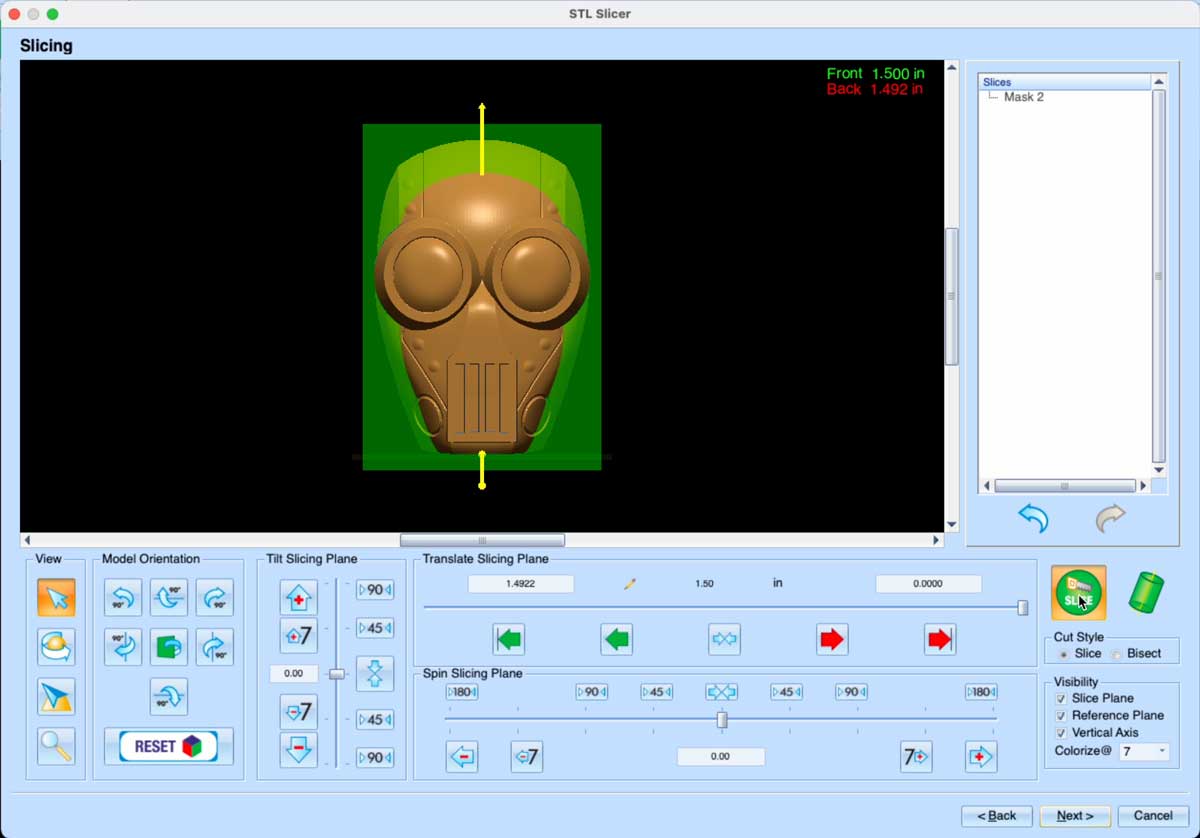
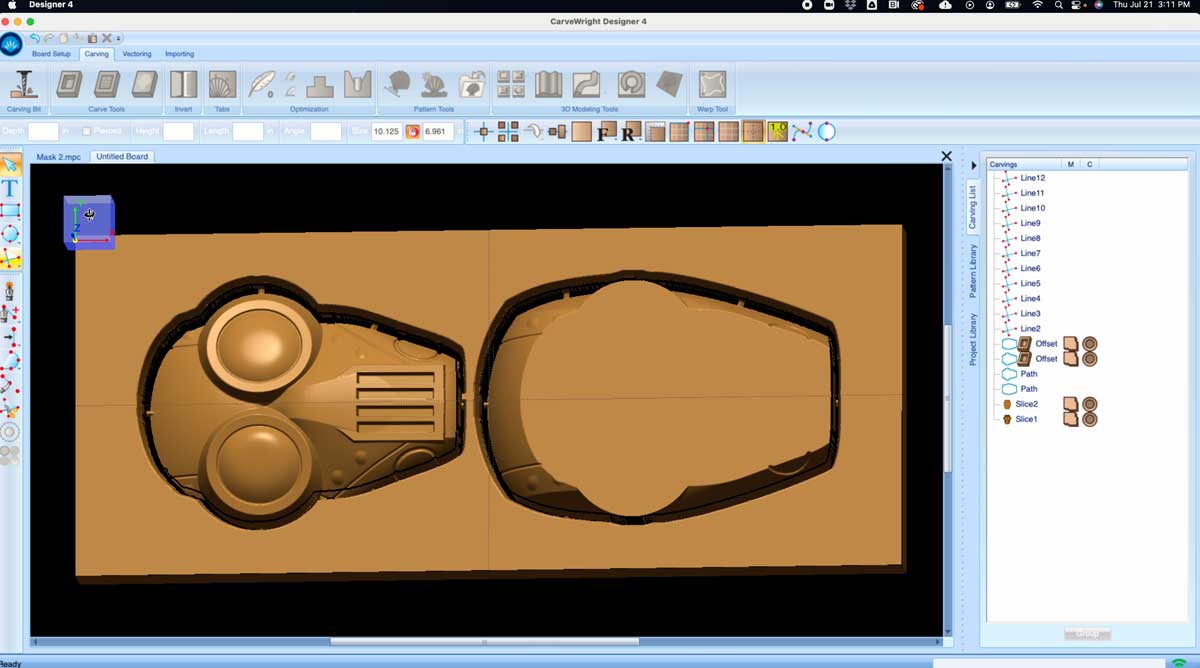
I planned to carve this out of 1.5” material so I set my slice depth and cut the mask into 2 sections. Then I saved the slices into my pattern library for the final layout.
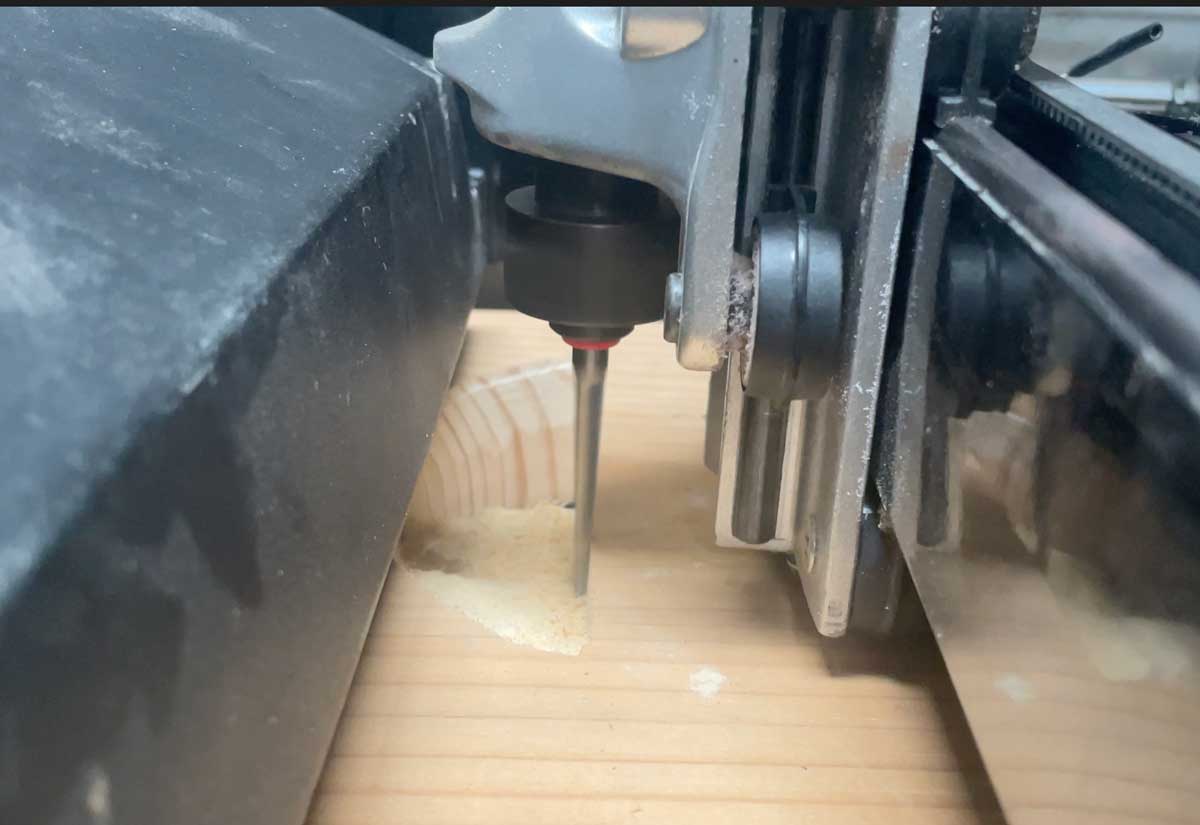
Carving the Project
With the design finished I compiled it and took it to the RAVEN for carving. It took about 6 hours with the ⅛” Deep Carve bit.
Once carved, I removed the tabs and glued the 2 halves together.
Assembly and Sanding
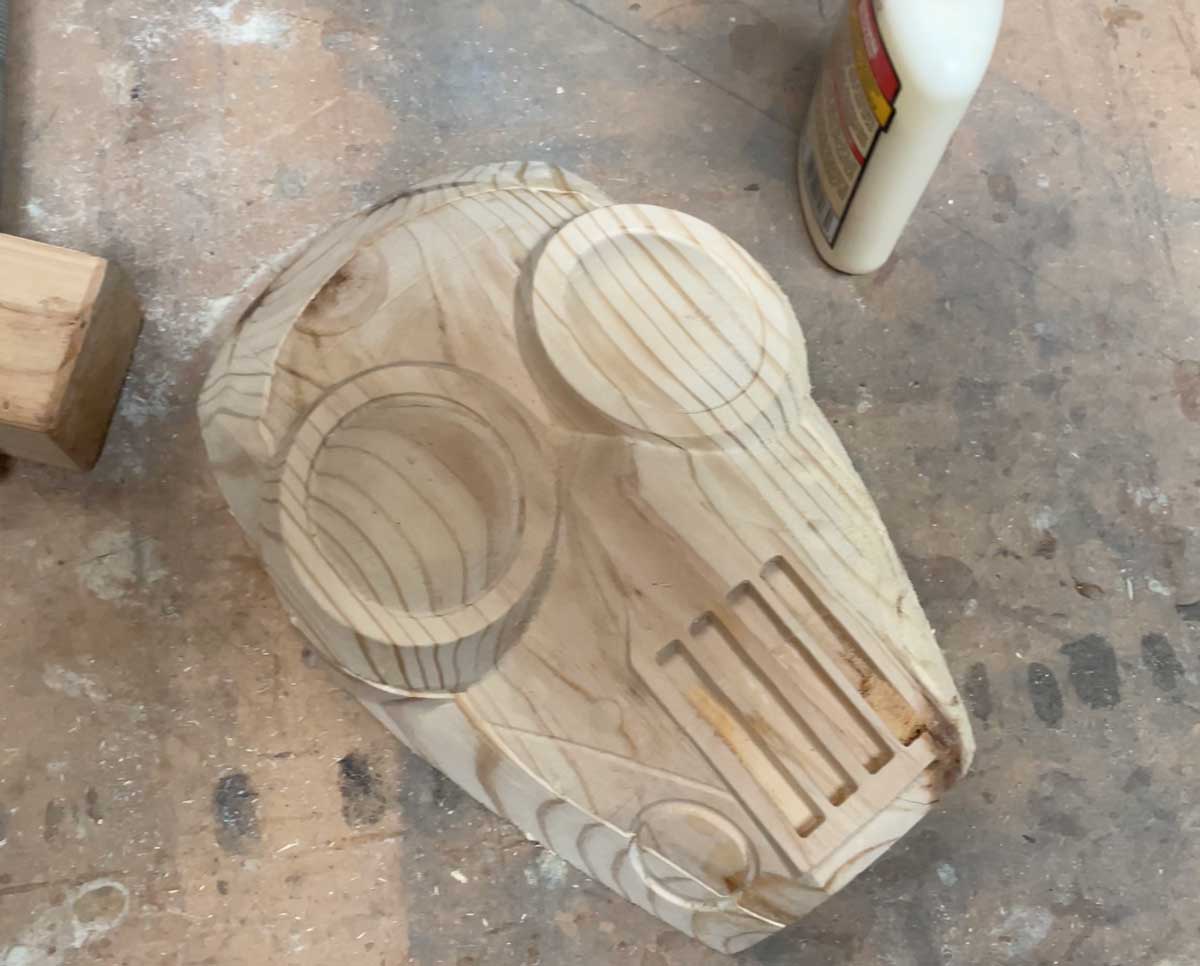
After the glue was dried it was time to do some filling, priming, sanding, and repeat. For the mold this needs to be very smooth with no seam lines.
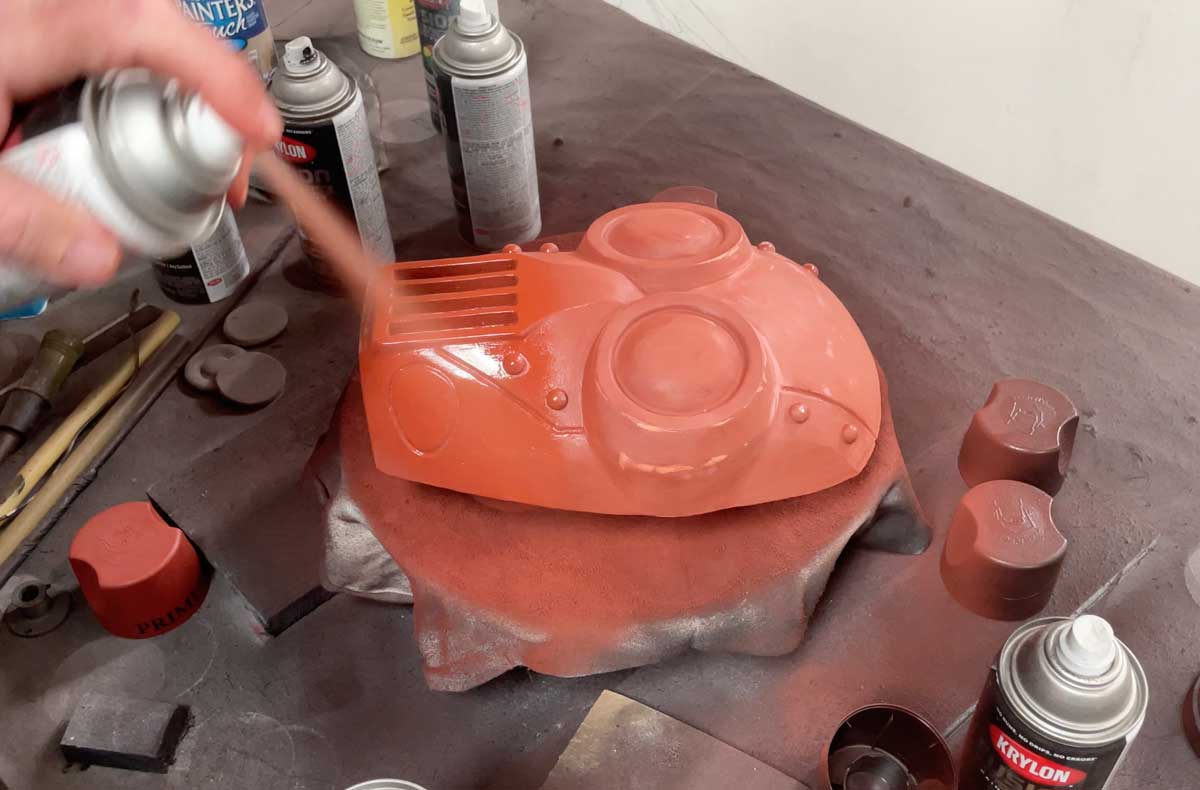
Vacuum Former
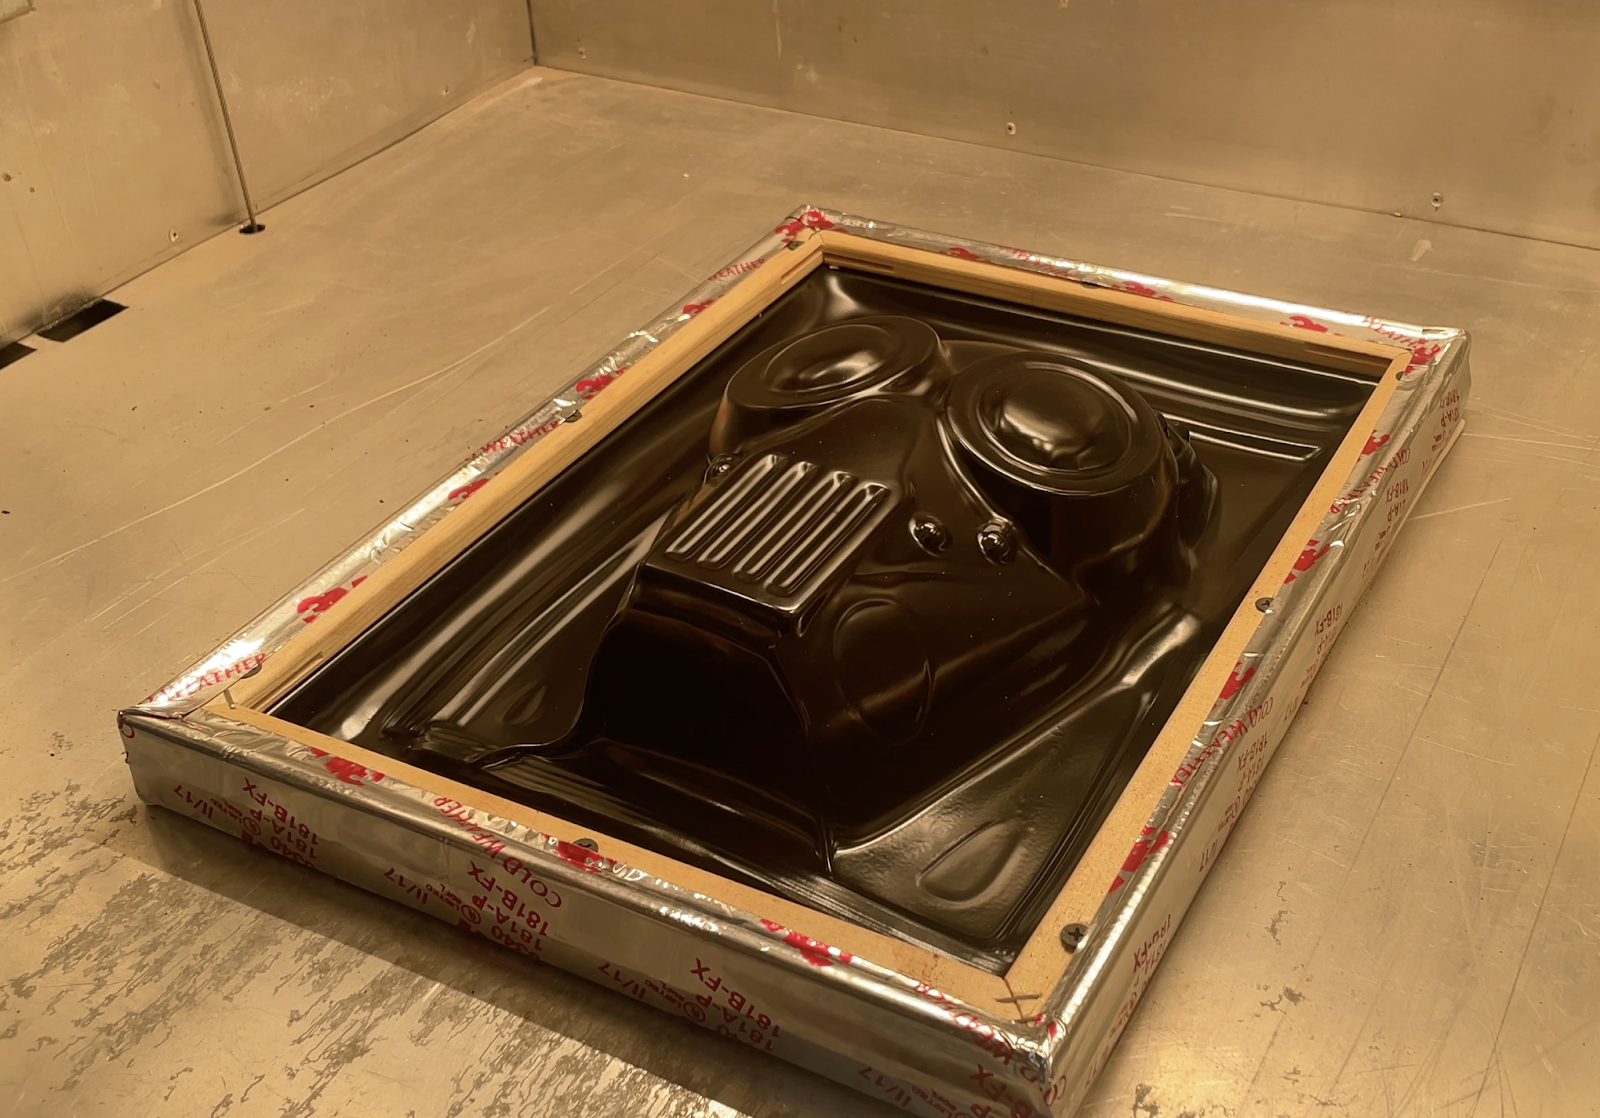
Once smoothed out perfectly, it was time to take it to the vacuum former.
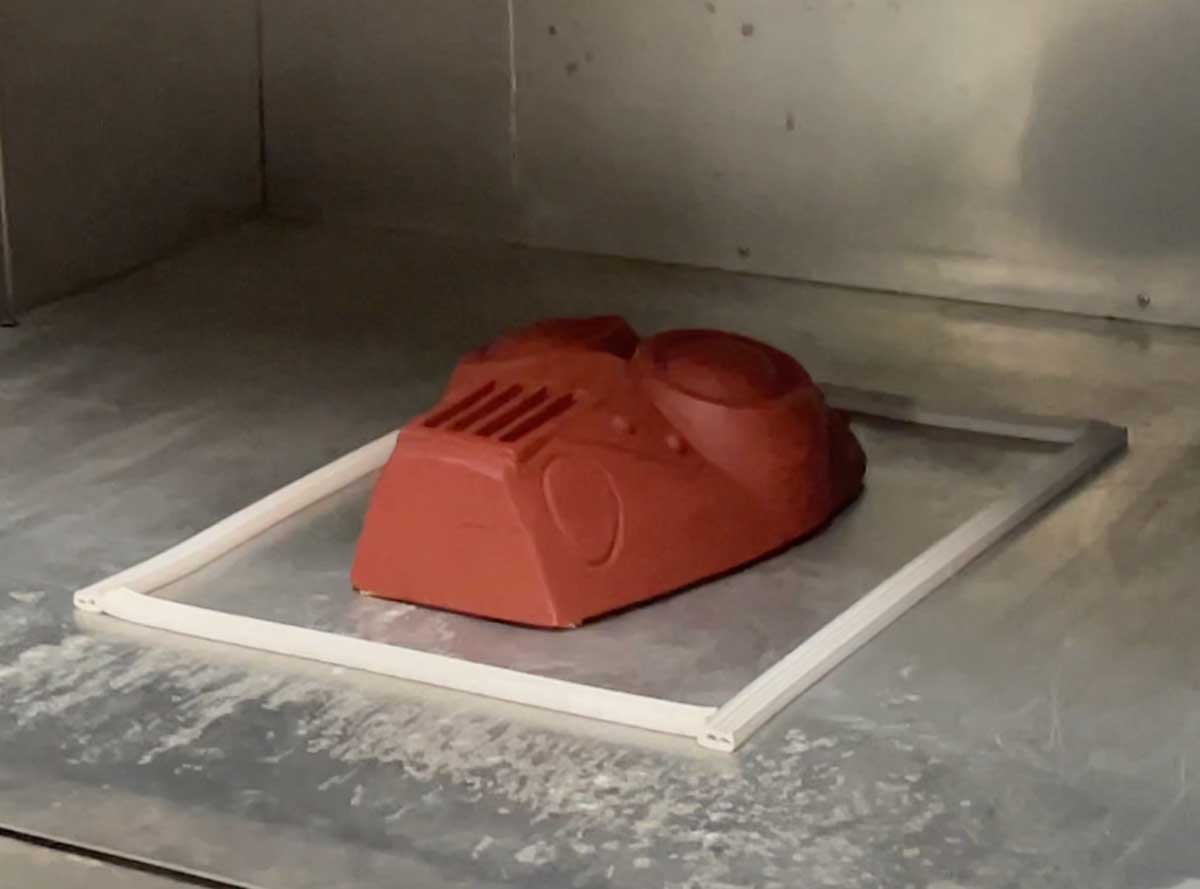
This vacuformer is a home built contraption made by my brother, but there are some pretty amazing systems on the market now that have recently caught my eye. Check out https://mayku.me/.
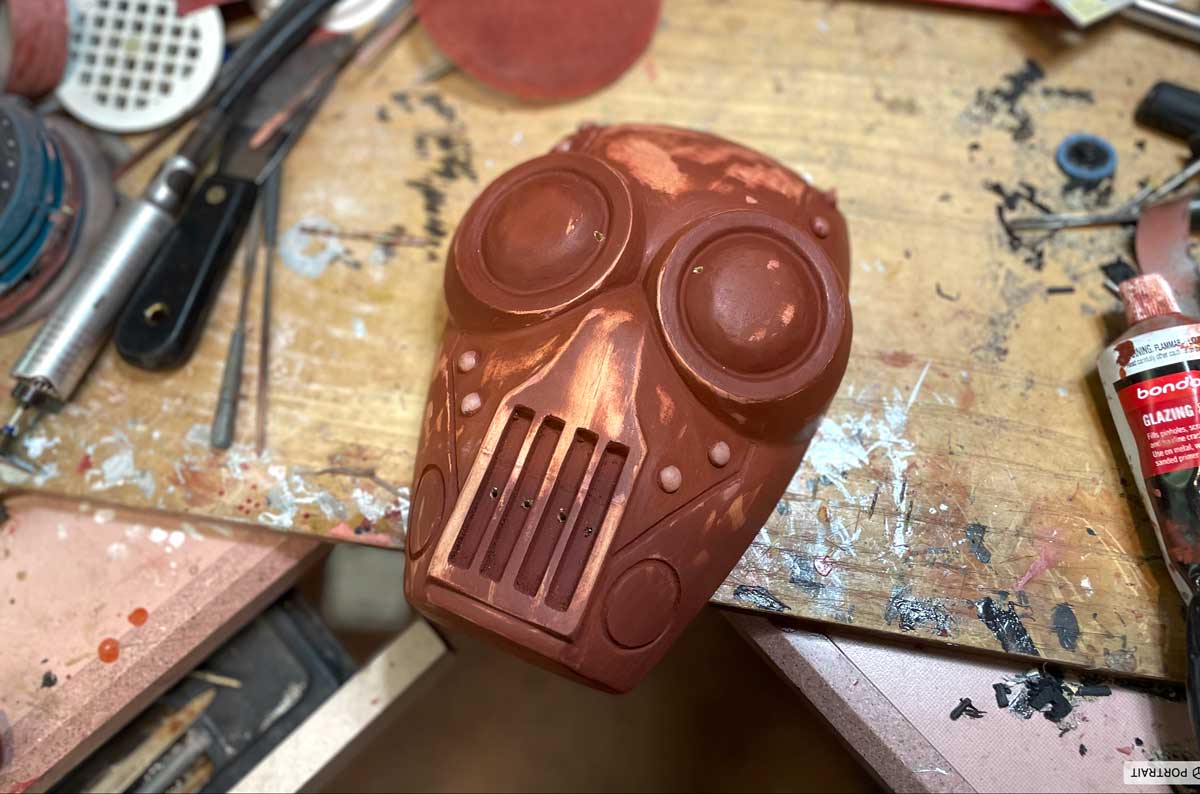
Finishing
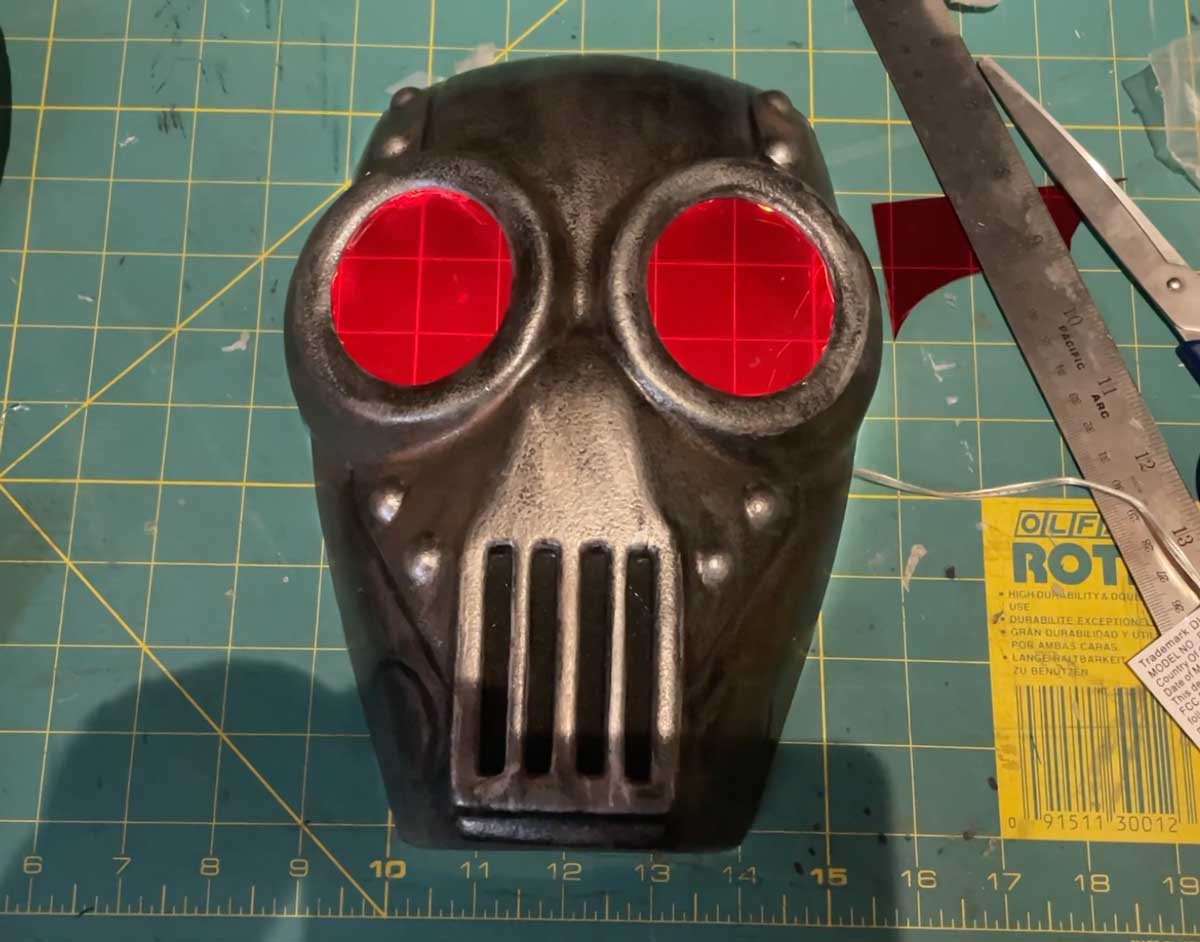
After the mask was formed and trimmed, then it was just a matter of painting. First, I coated it with some silver spray paint.
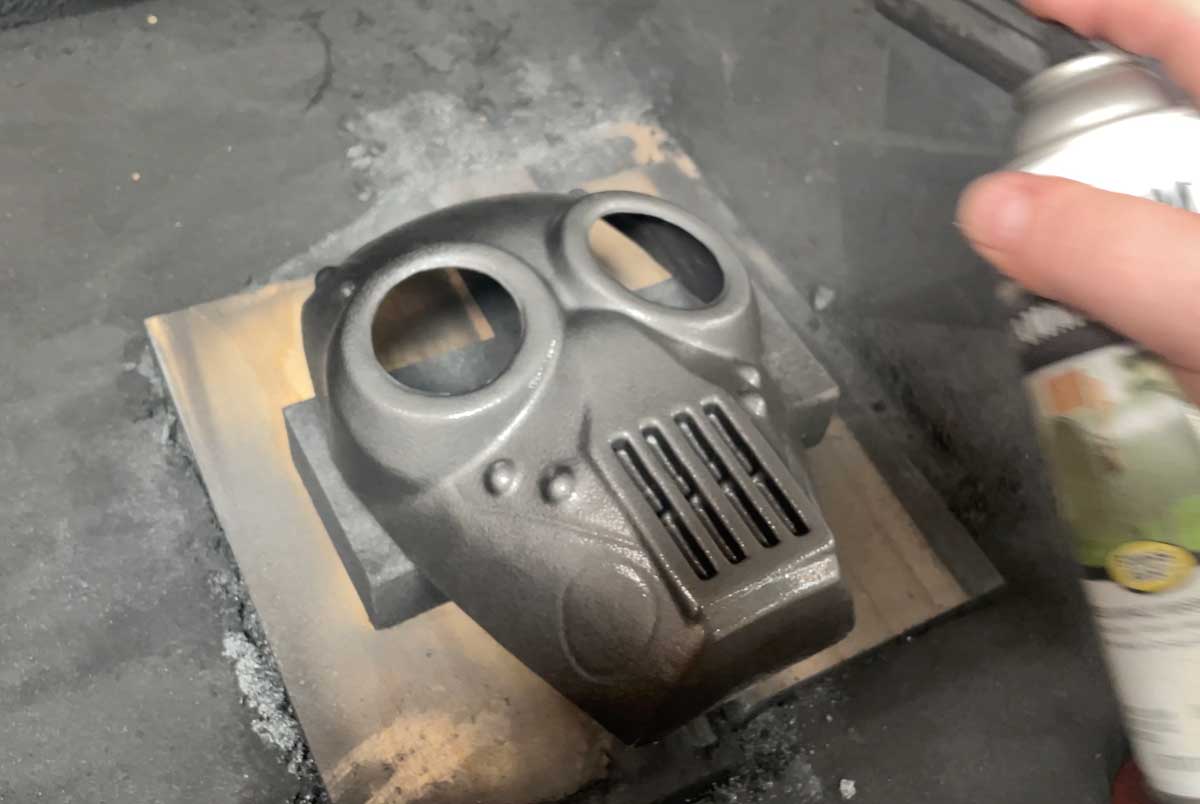
Then I used brushes and paint pens to add details and dirty it up a bit.
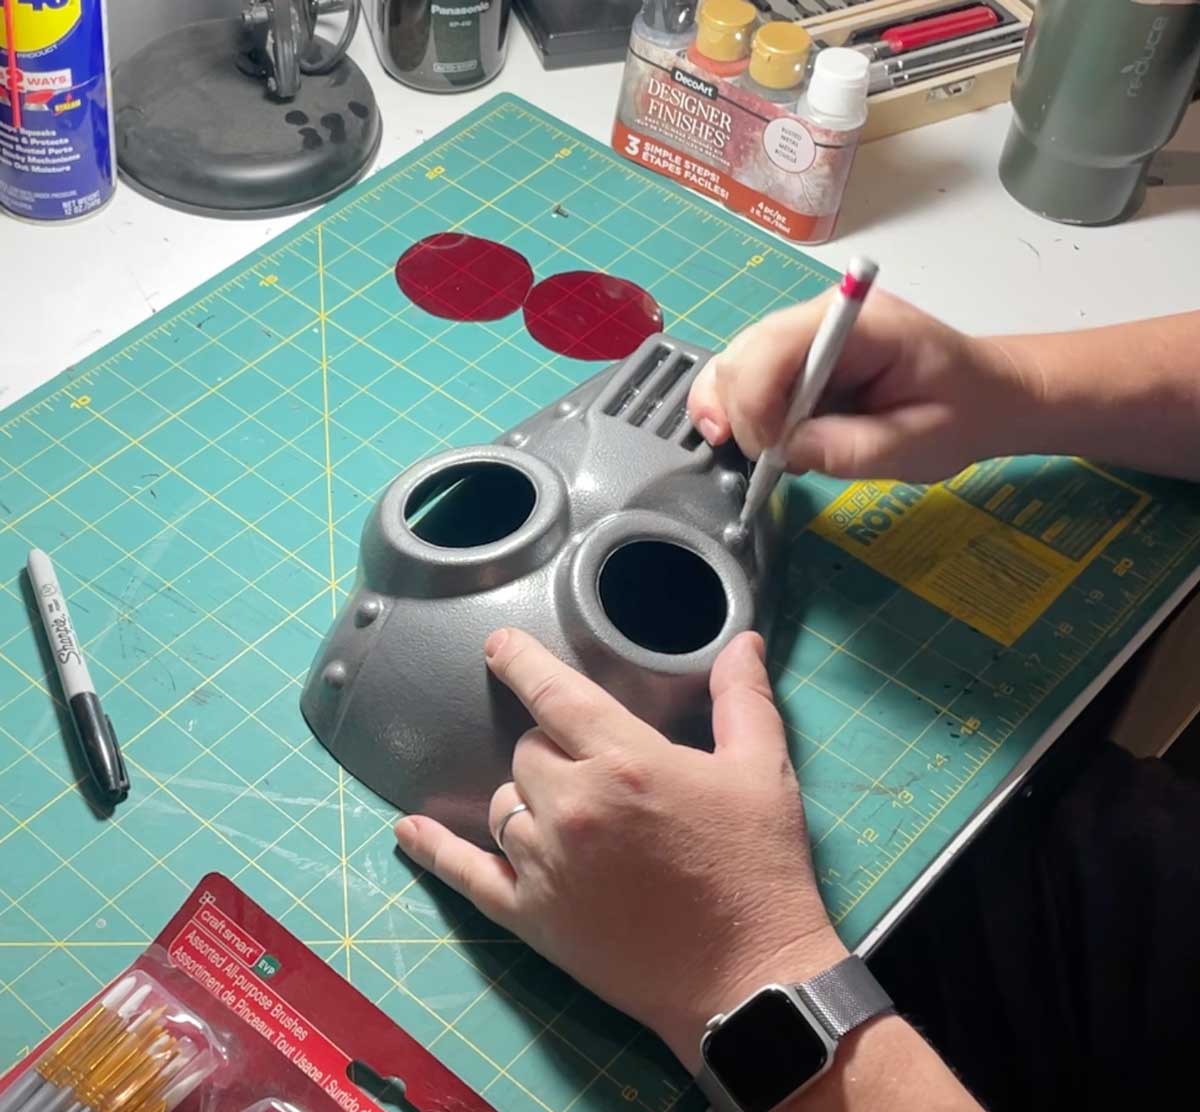
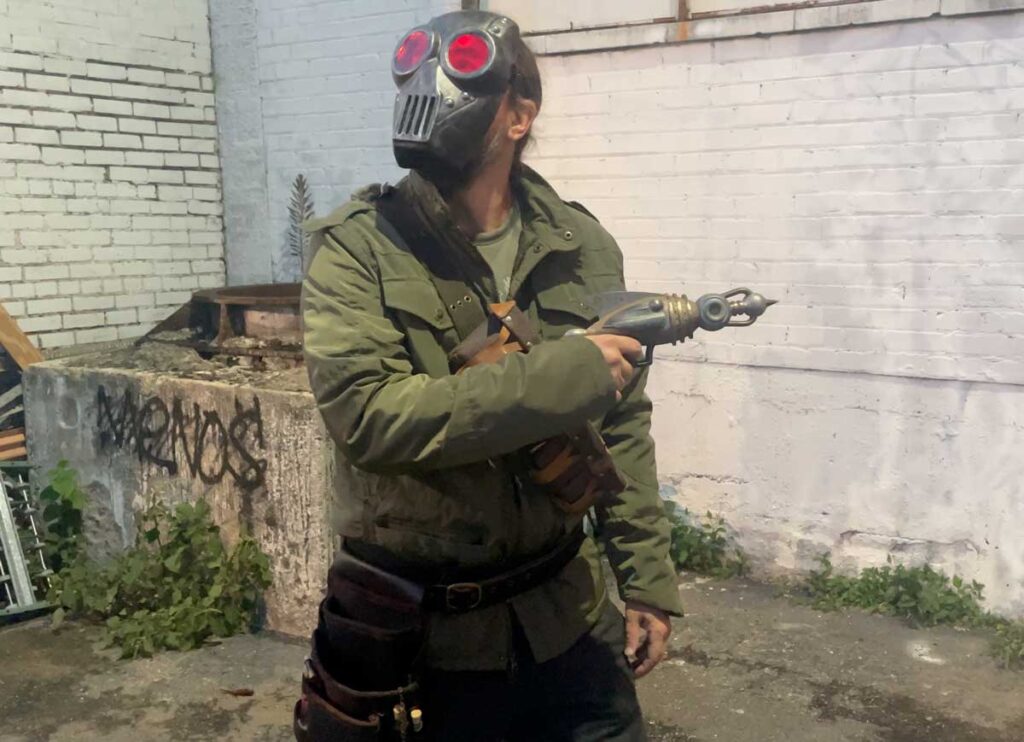
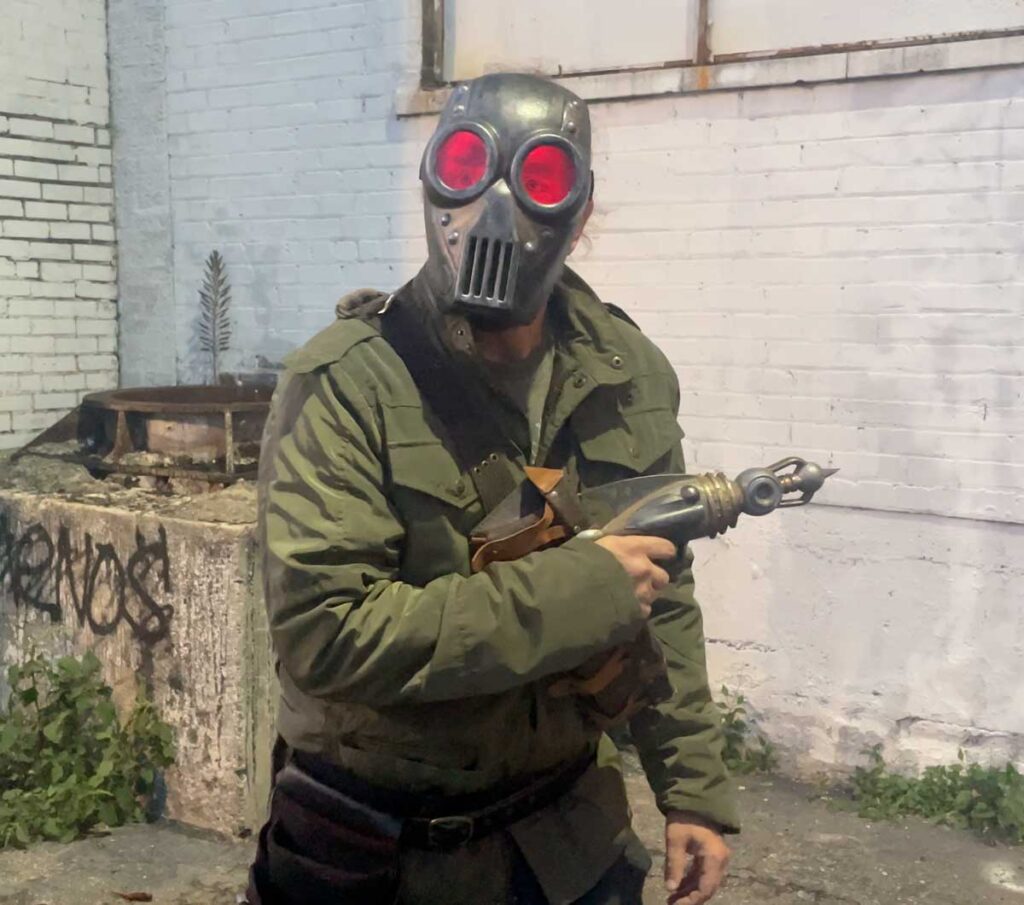
After the painting, I added some red plastic for the lenses and then put in some lights. I had some battery powered mini fairy lights leftover from last Christmas’ projects and decided I could coil these up to make a couple of lighted rings and just hot glue them in.
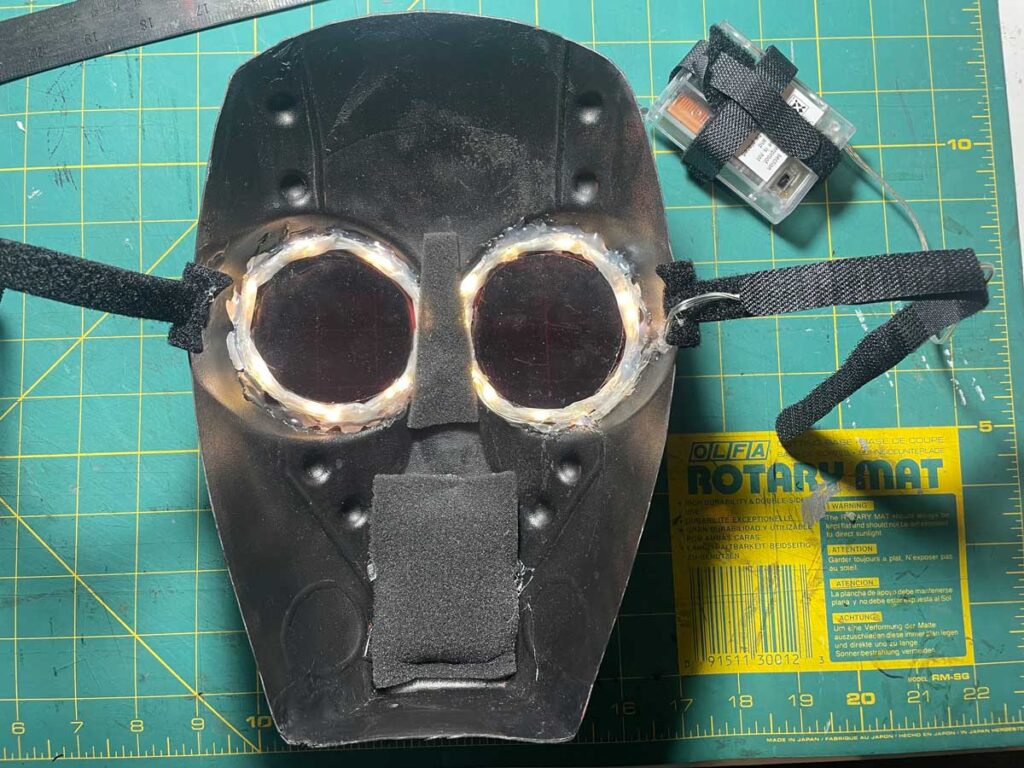
It was a last minute crude solution, but the results worked great.
The last step was to loop some velcro strips in as a strap and it was ready to go.
Final
We paired the mask with my raygun project for fun in these photos.
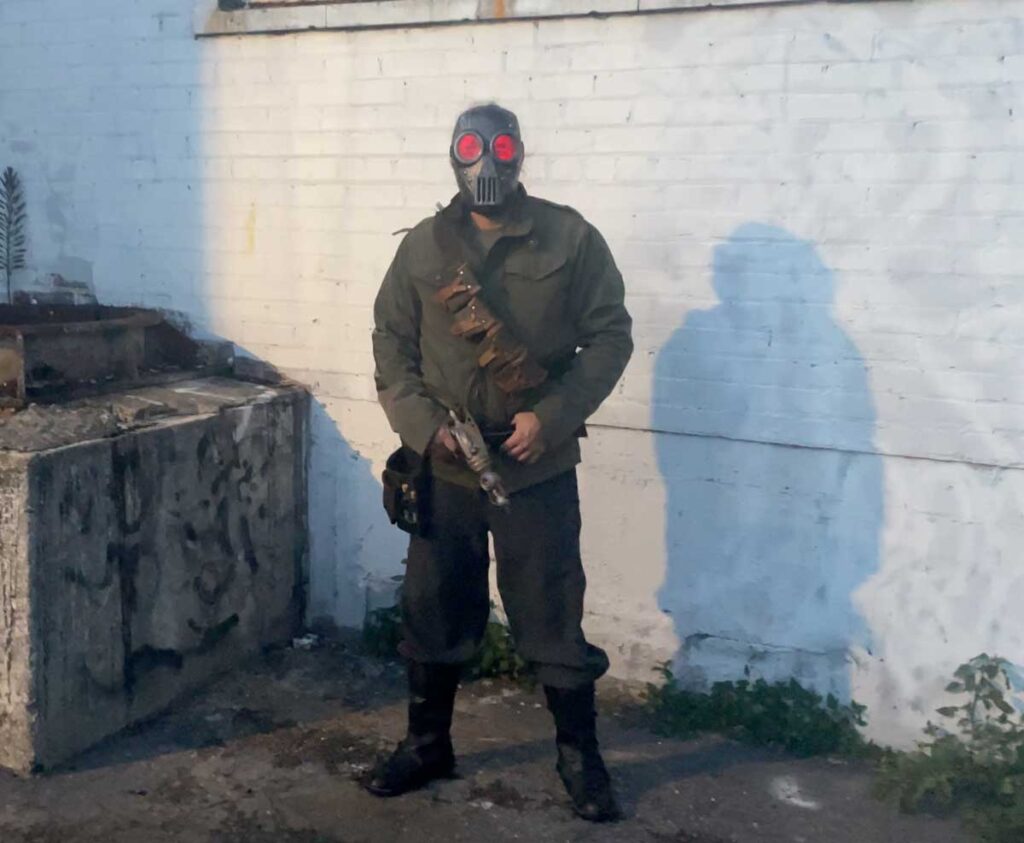
It was a lot of fun to create this and I hope it inspires you to go make something great!